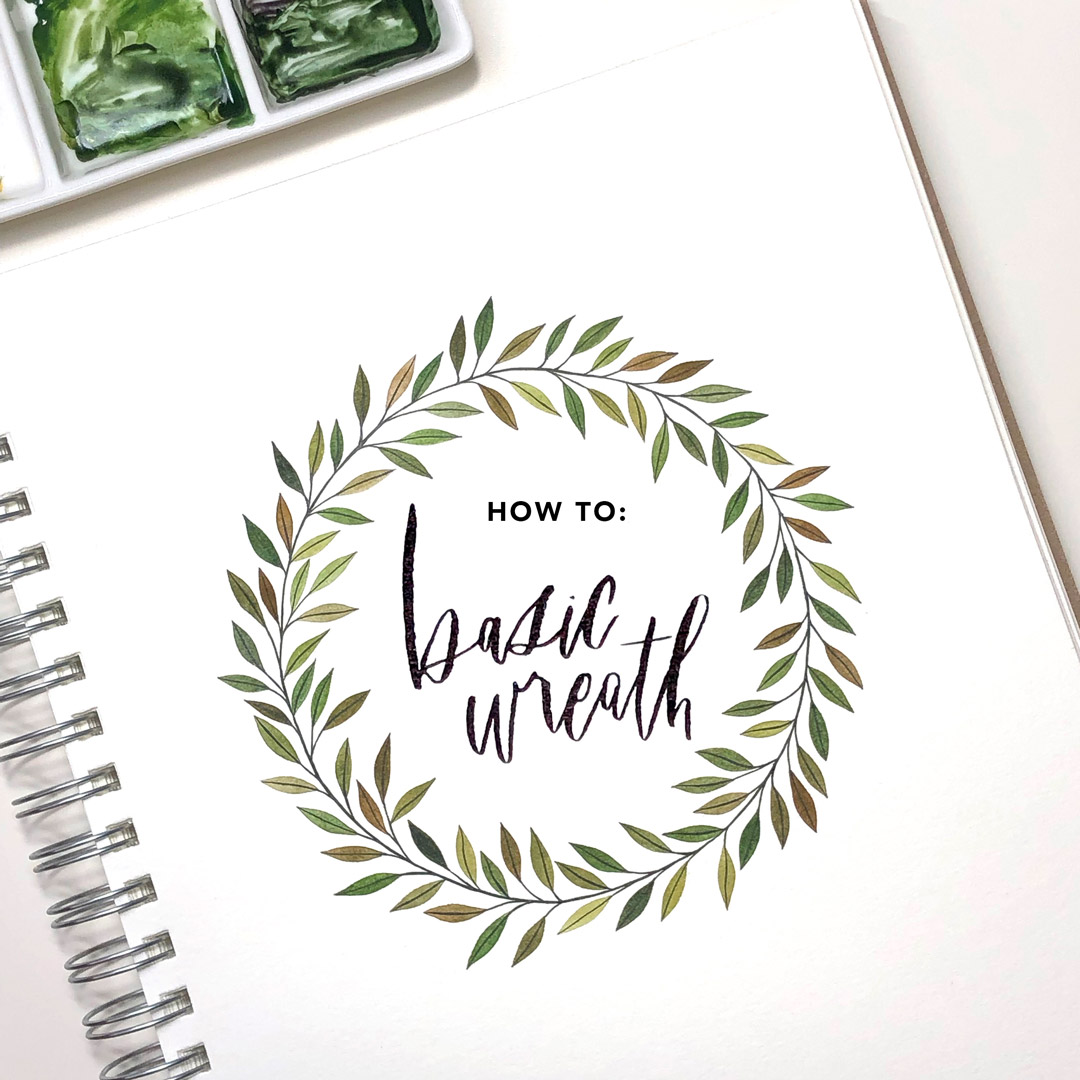
Have you ever wondered how to paint clean and elegant wreaths? Now is your chance! In our November blog, featured artist Justine Lazo gives you step-by-step instructions on how to paint the perfect watercolor wreath, just in time for the holidays.
How To: Basic Wreath Tutorial
by Justine Lazo (@jusebox)
I love painting leaves and wreaths of leaves. I especially love mixing earth tones to make them. In this blog post, I’ll go over my typical process of painting a wreath of leaves. I hope that you enjoy this tutorial!
Step 1) Gather Your Materials
You will need the following materials to paint a wreath:
A) Mixing Palette. There are all sorts of palettes out there, manufactured artist palettes or objects you can repurpose as palettes. I currently use a ceramic dish for holding sauces (most times I use a ceramic plate) for my palette because it’s inexpensive and easy to clean!
B) Brushes. I recommend using two different sized brushes: one brush for painting your leaves and a smaller brush for adding your details. I’m using round synthetic brushes in sizes 0 and 5/0.
C) Pencil. A pencil for sketching your outline.
D) Compass. I enjoy using a compass to sketch my initial circle. However, you can simply trace another round object or freehand it, if you prefer.
E) Watercolor Paints. I’m using M. Graham watercolor paints for this wreath. Ultimately, work with the colors you want to. Some of my favorite colors are Naples Yellow, Pyrrol Scarlet, Hooker’s Green, Sap Green, and Neutral Tint.
F) Paper. I’m using Pentalic’s Nature Sketch sketchbook. I gravitate towards paper with a smoother texture so that my painted lines will be precise and crisp. Any mixed media or watercolor paper will work best for this.
G) Water. I put my water in a heavy mason jar or mug so that I don’t accidentally tip it over. Unless I’m working with colors other than my green mixes, I stick to using one water jar.
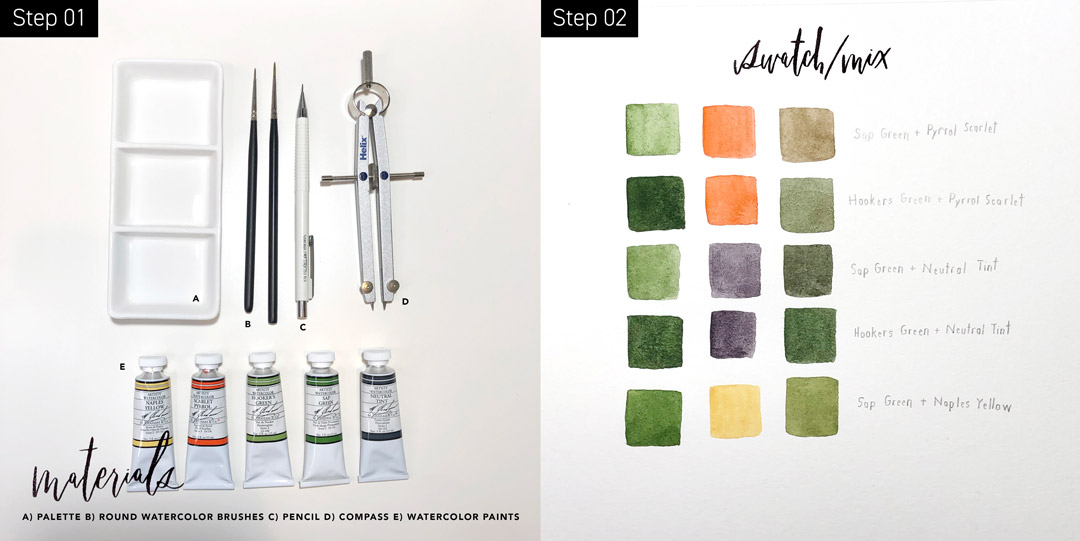
Step 2) Swatch & Mix Your Colors
Unless you already know which colors you want to work with, experimenting with mixing watercolor paints is always fun and great practice for future reference. I’ve included a photo of my most commonly mixed colors.
I primarily work with green (or blue + yellow) as a base color. I use the following colors to mix with greens:
Pyrrol Scarlet: This color is very pigmented, so make sure you start off with very little and keep adding small amounts until you get the color you want. I mix this with greens to get browns and deeper greens.
Neutral Tint: I use this color to darken my watercolor paints and mixes.
Naples Yellow: Yellow + green = yellow green. This mix adds a nice contrast to an earth-toned color wreath.
Step 3) Sketch
Start off by sketching a circle then add a few leaf shapes all around it. Next, add branches and connect them to the circle base. After that, add fillers all around the circle (by connecting more leaves to branches or to the circle base).
I recommend sketching your shapes lightly, especially when working with lighter washes and colors. However, I have a heavy hand so I use a kneaded eraser to lighten up my pencil sketch prior to painting.
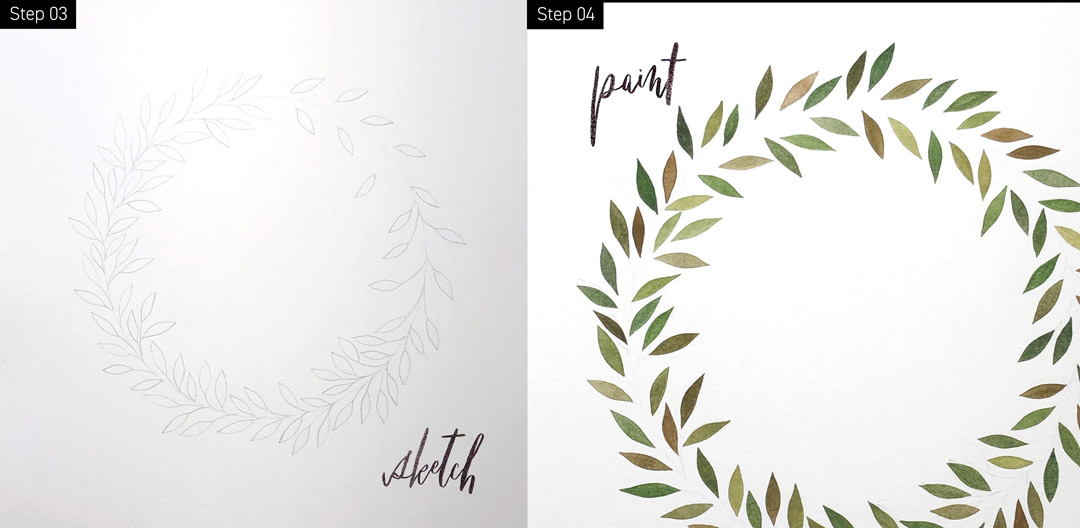
Step 4) Paint
Paint your leaves first, in random sequences and color mixes. Sometimes I’ll go off my initial sketch, which is why it is helpful to use light pencil markings. Let the paint of the leaves dry before proceeding to the next step.
If you’re unsure if your paint has dried, take a napkin and carefully press it onto a small area of your painting. If no paint transfers onto the napkin, you should be good to go. It’s also important that the paint is dry before adding your details, to ensure that the color from the leaves won’t bleed onto other wreath details. If mistakes happen, paint over them again with a darker color.
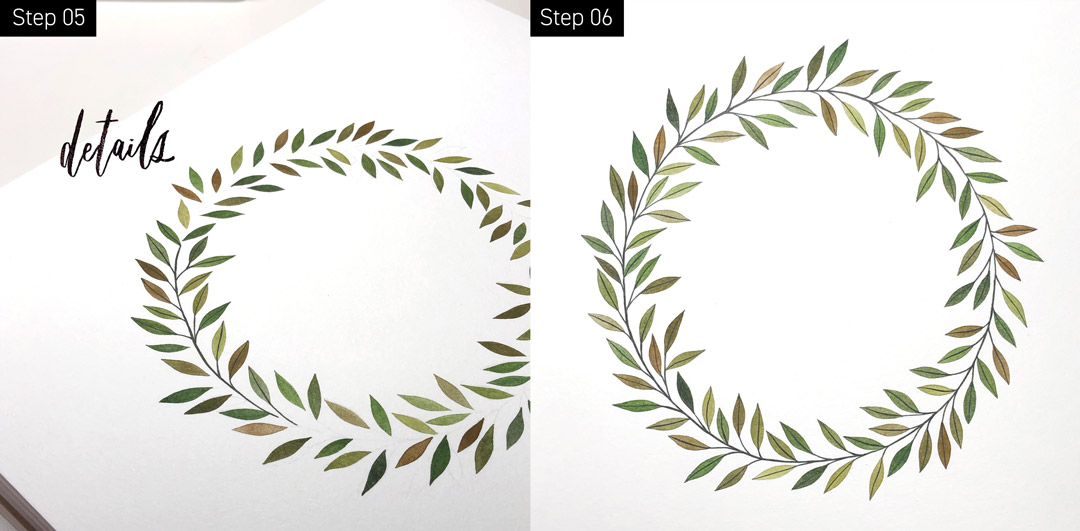
Step 5) Add Details
This is my favorite part of all. Being able to “complete” a painting by adding details is just so satisfying!
I use a thicker mix of green and Neutral Tint for my branches and details. This mix makes my line work crisper and more precise. A thicker mix of paint means less water, and dipping your brush in water more often, due to evaporation. Allow time for the paint to dry before turning to a new page of your sketchbook, or putting it away.
Step 6) You’re Finished!